This article describes how to integrate a distance sensor into a SiteKiosk Online project. A distance sensor can be used in two different ways in a SiteKiosk Online project:
- Distance measurement: Depending on the defined distance between the user and the sensor, specific project content (images, videos, documents, etc.) can be displayed or hidden on the terminal.
- Activity measurement: A new session can be automatically started when the user falls below a certain distance to the sensor. When this distance is exceeded, the session ends and the screensaver is activated.
Necessary project components:
- SiteKiosk Online Version 1.5 or newer
- HSRUB-MaxSonar-EZ by MaxBotix (product link here)
- Display (Windows 10 or higher / Android Version .6 and higher)
Info: The distance sensor HSRUB-MaxSonar-EZ used here measures in millimetres. Depending on the sensor type, the standard unit of measurement may vary. Check in advance which unit of length your distance sensor measures in.
Set Up: Set everything up so that at least SiteKiosk Online Version 1.5 is installed and running on your terminal/display and the HSRUB-MaxSonar-EZ sensor is connected. Log in to your SiteKiosk Online account in your browser on your PC.
1. Distance Sensor Configuration
- Use a project that contains at least one element (e.g., a video).
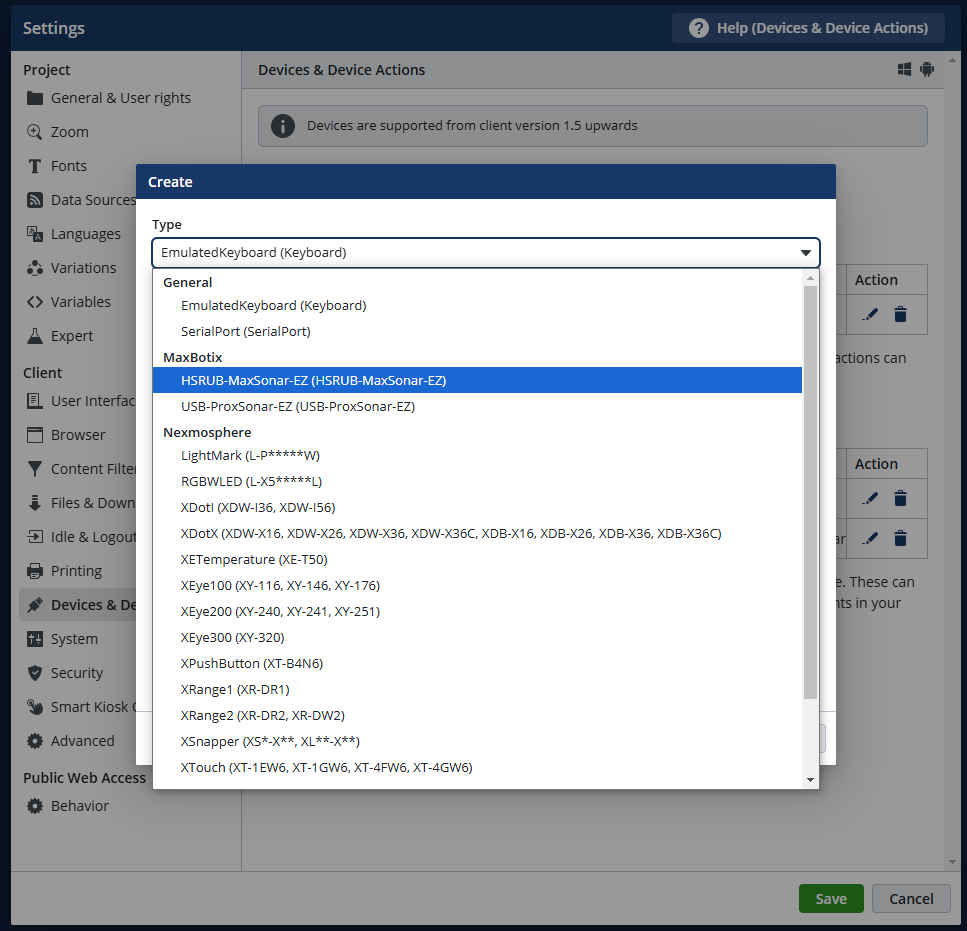
- In the project settings, go to the “Devices & Device Actions” section.
- Click on the upper green action area “Add Device”.
- Select the device type “HSRUB-MaxSonar-EZ” from the dropdown menu, click “Next”.
- If desired, you can name the sensor individually, click “Save”.
- The device has been successfully added.
2. Determine Sensor Action
Next, the device action must be defined to trigger a specific action in the project. The distance sensor can trigger two different actions:
- Distance measurement: Depending on the user’s distance, the sensor can display different content on the terminal.
- Activity state: As soon as a person is detected by the sensor, the activity state is activated, the screensaver is ended, and a new session is started. The opposite inactivity state is reached when a user exceeds a certain distance to the sensor for a predefined time (the screensaver starts and the current session ends).
The setup of both functions is explained in the following chapters.
3. Distance Measurement as an Action
In projects where distance measurement is to be used as a trigger for an action (displaying an element), the following settings must be made:
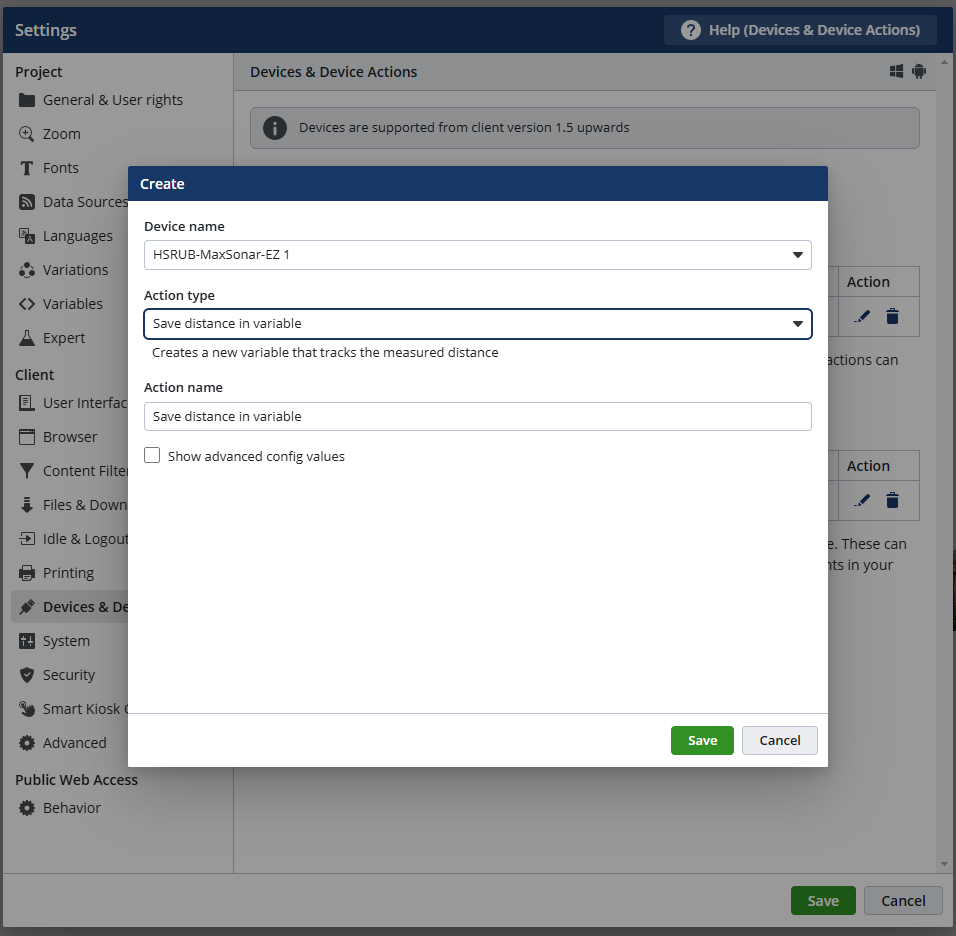
- In the project settings, in the “Devices and Device Actions” category, click on the lower green button “Add device action”.
- In the “Type of Action” row, select the option “Save distance in variable” and then click “Save”.
- The necessary variable was automatically created through this process.
- Click “Save” again to close the Settings
3.1 Determine display conditions:
Next, display conditions must be defined, which result from the user’s distance to the sensor:
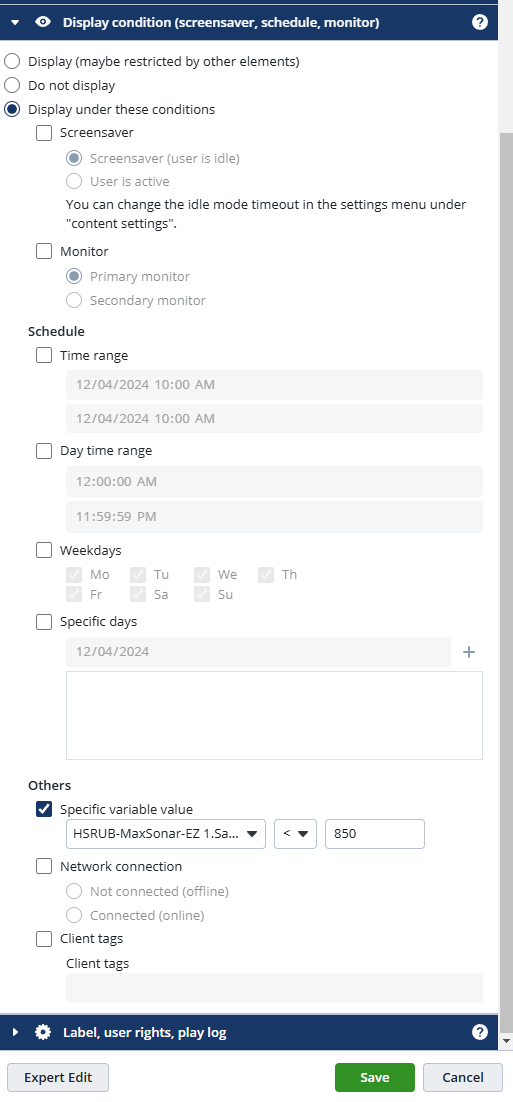
- Open the properties of a project element, e.g., an image that should react to the sensor’s measurement.
- Go to the Display conditions section and activate the radio button “Display under these conditions”.
- In the “Others” settings area, click on the box “Specific variable value”.
- Click on the “choose variable” drop-down menu and select “HSRUB-MaxSonar-EZ.Distance.range”.
- Select the “<" symbol in the middle drop-down menu to determine that an action is performed as soon as the set value is undercut.
- Enter the desired distance value in the right box that must be undercut for the sensor to trigger the set action and display the project element on the terminal. If 850 is entered here, for example, the action is triggered as soon as a person is closer than 850 mm to the sensor.
- Finally, click “Save”.
- Repeat this process with all elements that should react to the sensor and adjust the variable value according to the desired distance value.
4. Activity State as an Action
The distance sensor can switch the terminal from the inactive state (e.g., screensaver) to the active state. By approaching the sensor, the screensaver can be ended and a new session started. Follow these configuration steps for this action:
4.1 Create screensaver page:
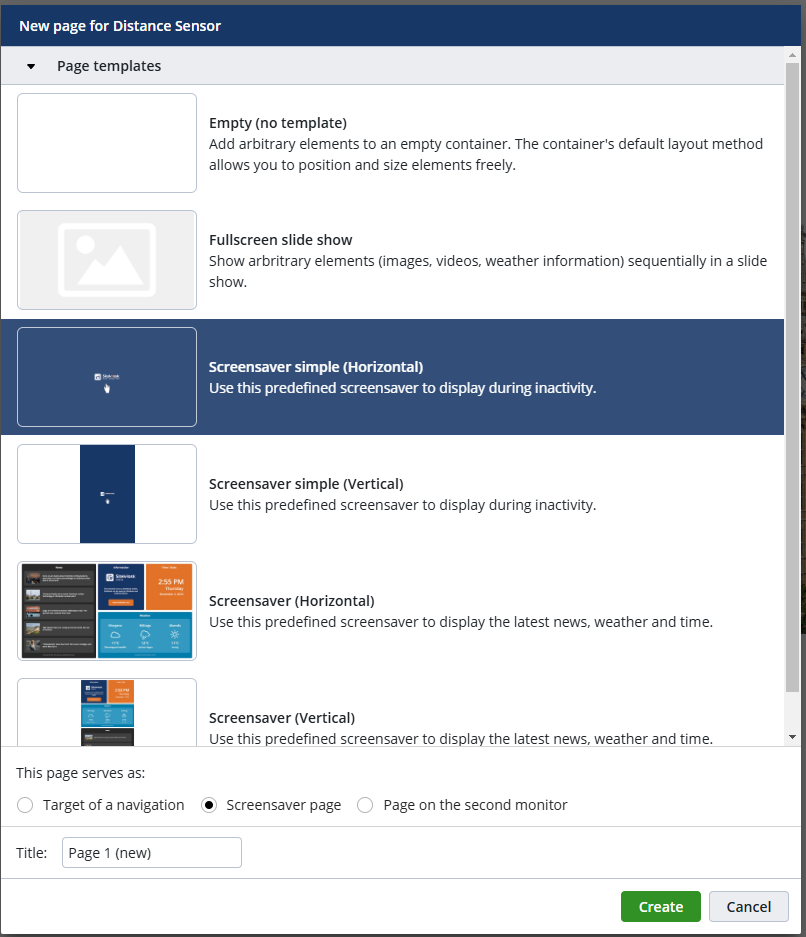
- Create a screensaver page by clicking the green “+” button on the right side of the screen in the upper “Pages” column.
- In this example, the template “Screensaver simple (Horizontal)” was selected. Make sure that in the selection row “This page serves as:” the option “Screensaver page” is selected. Elements can also be used as screensavers; for this, the display condition must be manually adjusted on the desired element (Screensaver (User inactive)).
- Click “Create”.
Info: By default, the screensaver starts after 300 seconds of inactivity. This value can be changed in the project settings under “Idle & Logout”.
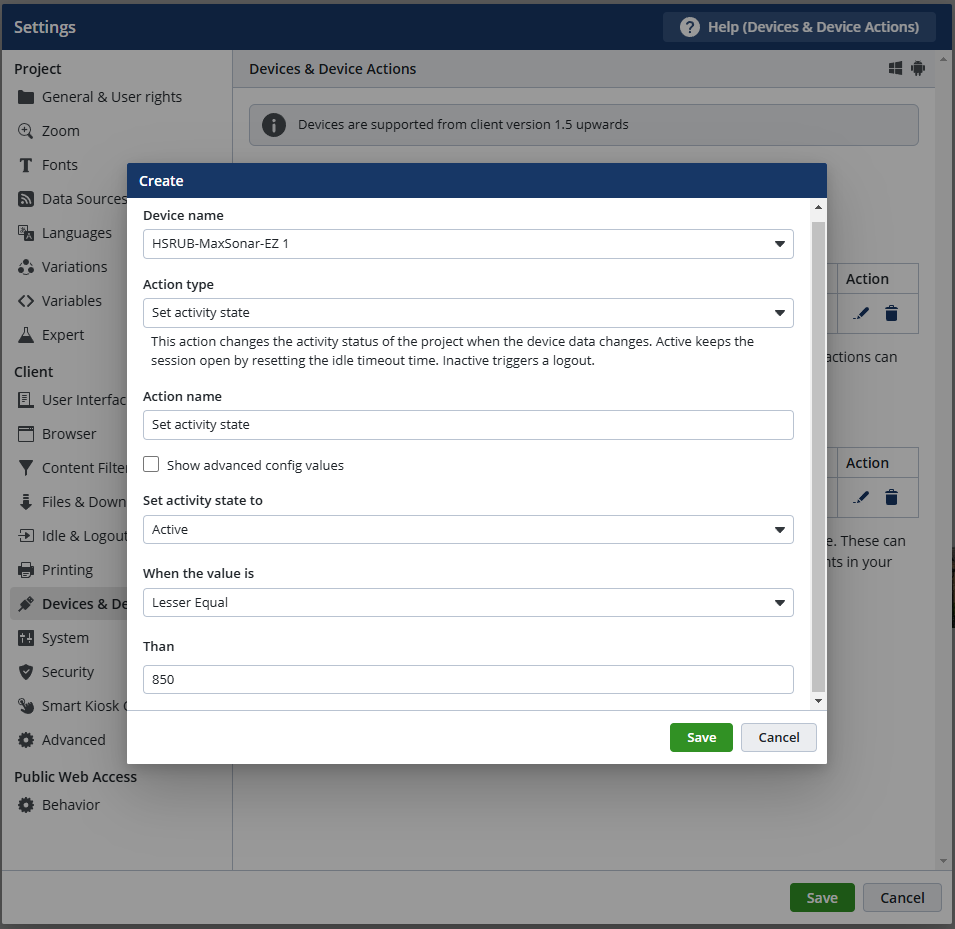
4.2 Trigger activity state:
- In the project settings, go to the “Devices & Device Actions” section and click on the lower green button “Add device action”.
- In the “Action type” area, select the option “Set activity state”.
- In the “Set activity state to” area, select the “Active” option.
- In the “When the value is” drop down menu, select the “Lesser Equal” option.
- In the “Than” row, enter a distance value that determines at what distance between the user and the sensor the activity state should be triggered. The value 850 used here determines that the action is triggered as soon as a person is closer than 850 mm to the sensor.
- Then click “Save”.
- Click “Save” again to close the entire project settings.
Info: If no user is in the sensor area for a certain time, the running project automatically switches to the inactive state (screensaver) and ends the current session.
5. Publishing the Project
- Now publish the project on your terminal.
- Approach the distance sensor and test whether the desired effect of distance measurement and/or start of the activity state occurs.
Info: The distance-dependent display of content and the triggering of the activity state can also be used simultaneously in the same project.
Notes:
The present example describes the integration of the HSRUB-MaxSonar-EZ proximity sensor into a kiosk project. The distance sensor used is one of many different devices and sensors that can be integrated into SiteKiosk Online projects.
A list of other sensors, devices, and hardware can be found here: Supported Devices.
If you want to use sensors or devices that are not listed or if you have further questions and suggestions on the topic, please feel free to contact us!
Get in contact via mail sales-europe@sitekiosk.com or via telephone: +49 (251) 846 924-0.
